
An easy, vanilla sugar cookie dough is topped with sinful Nutella to make these Nutella thumbprint cookies. A twist on your classic holiday thumbprint cookie that is sure to please!

Disclosure: As an Amazon Associate I earn a small commission from qualifying purchases, however this is at no cost to you. Read my disclosure policy here.
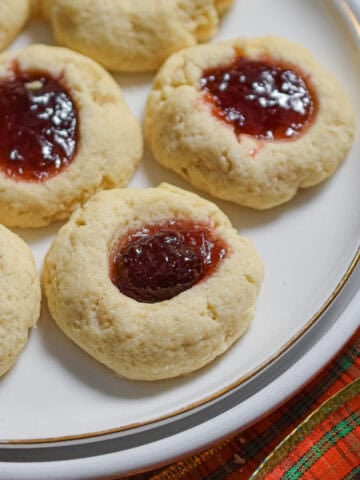
Thumbprint cookies are a staple around the holidays. This recipe is the classic thumbprint recipe, except instead of adding a jam like in these peanut butter and jam thumbprints or 5 ingredient raspberry cheesecake thumbprint cookies, I added Nutella.
We love Nutella in my family. I love baking with it, like in this Nutella Zucchini Bread and these Nutella Swirl Cheesecake Bars. It's a nice change from jam, and who doesn't love Nutella!
Jump to:
- Ingredients For Nutella Thumbprint Cookies
- Why Are There No Leavening Agents In The Ingredients?
- Equipment You'll Need
- How To Make Nutella Thumbprint Cookies
- Step By Step Photos
- How To Add The Nutella To The Thumbprint Cookies
- Does The Nutella Harden?
- Variations Of These Thumbprints
- Frequently Asked Questions
- Other Recipes To Try!
- 📖 Recipe
Ingredients For Nutella Thumbprint Cookies

- Butter- at room temperature
- Sugar- granulated sugar to keep the cookies looking as light as possible
- Eggs
- Vanilla extract- Pure vanilla extract is best
- All Purpose Flour
- Salt- to enhance the flavors in the cookies
Why Are There No Leavening Agents In The Ingredients?
In this recipe, the eggs are doing the little bit of rising that we need in the cookie. These cookies are chewy, not light and airy, which can often be the case when you use baking soda or baking powder.
These cookies need to hold the thumbprint in the middle, so they can't spread too much when baking. To avoid spreading, we are leaving out the baking soda and baking powder. It might seem a little strange, but a lot of cookie recipes leave out the leavening agents in order to hold the integrity of the cookie. We don't want a giant baking sheet of spread-out cookies. Where would the Nutella go?

Equipment You'll Need
- Stand Mixer or Hand Mixer
- Measuring Cups
- Measuring Spoons
- Parchment Paper or Silicone Mat
- Baking Sheet
- Wire Cooling Rack
- Ziploc Bags

How To Make Nutella Thumbprint Cookies
- In the bowl of a stand mixer fitted with the paddle attachment, beat the butter and sugar on medium speed until light and creamy. Add the eggs and vanilla and beat again until smooth.
- Turn the speed to low and add the flour. Mix until well combined.
- Place the dough onto a sheet of plastic wrap and refrigerate for at least 30 minutes.
- When ready to bake, preheat the oven to 350 degrees.
- Take the dough out of the refrigerator and pinch off 1 inch pieces of dough.
- Roll the dough into balls and place them on a parchment lined baking sheet. With your thumb, press into the center of the cookie to make a well. Repeat this process until the baking sheet is full. Leave about one inch space between each of the cookies.
- Bake 12 minutes or until the cookies are just slightly golden brown. Take the cookies off of the baking sheet and place them on a wire rack.
- Place the Nutella in a microwave safe bowl and microwave for 15 seconds. Pour the Nutella into a Ziploc bag and cut the end of the Ziploc bag off. Pipe the Nutella into the well in the middle of the cookie. Repeat this process for all the cookies.
Step By Step Photos


How To Add The Nutella To The Thumbprint Cookies
Nutella can be a little bit messy, and to get the Nutella into the cookies can be a little tricky.
I find the easiest way to do this is to put the Nutella in a microwave safe bowl and microwave it for 15 seconds. This will loosen the Nutella up to make it easier to pour.
Place the Nutella in a gallon Ziploc bag and cut of the corner of the bag with a scissor. Push the Nutella towards the end of the bag and gently pipe a puddle of Nutella onto each thumbprint, as seen below. If you have a piping bag, you can use that as well.
Wet your finger with a little water and gently push down on any peaks that the piping has caused. This will flatten out the Nutella and give a smooth finish.

Does The Nutella Harden?
The Nutella will stay gooey on the cookies because of the oil in the Nutella. It's not meant to harden.
These cookies would be great on a cookie tray, as opposed to a cookie tin for the holidays.
You can top these cookies with mini chocolate chips or sprinkles and that will keep the Nutella on the cookies and make less of a mess on a cookie tray.
Variations Of These Thumbprints
- Use jam instead! These thumbprints can be made using whatever you would like in the middle. Raspberry jam or apricot jam is classic!
- Roll the dough in nuts! Adding chopped walnuts or chopped hazelnuts will enhance the nutty flavor of the cookies!
- Top with sprinkles or mini chocolate chips! This will not only make them look pretty, but it will help keep the Nutella on the cookie and harden a bit.

Frequently Asked Questions
Yes! You can make the dough up to 24 hours in advance and let it hang out in the refrigerator. When you are ready to make, simply roll the dough into balls and imprint your thumb into the cookies. You can also bake the dough and keep it in an airtight container for up for 4 days. When you are ready to serve them, top with Nutella.
Yes! You can freeze unfilled thumbprint cookies for up to 3 months in an airtight container. When you are ready to serve them, top them with the Nutella. I don't recommend freezing them already topped with Nutella.
If the dough cracks when you are making the thumb imprint, don't stress! It's ok. You can pinch the dough back together to mend the crack. If the dough sits too long on the baking sheet before you put a thumbprint in it, they can crack. To avoid this, make the dough balls and then press your thumb into it immediately. This will help avoid the cracking.

Other Recipes To Try!
Did you love these Nutella Thumbprint Cookies? I'd so appreciate it if you would give this recipe a 5-star review! That will help other hungry readers find my recipes!
And don't forget to tag me on Instagram or Facebook and share this recipe on Pinterest! Thanks for sharing this journey with me and enjoy these delicious recipes!

- Peppermint Bark Brownie Mix Cookies
- Brown Sugar and Walnut Mini Tarts
- Brown Butter and Pecan Cookies
- Cinnamon and Sugar Kefir Snickerdoodles
- Strawberry Swirl Cheesecake Bars
- All in One Apple Cake
📖 Recipe

Chewy Nutella Thumbprint Cookies
Ingredients
- ½ cup Butter Room Temperature
- ¾ cup Sugar
- 2 Eggs
- 1 teaspoon Pure Vanilla Extract
- 2 cups All Purpose Flour
- ¼ teaspoon Salt
- ½ cup Nutella Plus more if needed
Instructions
- In the bowl of a stand mixer fitted with the paddle attachment, add the butter and sugar and mix on medium speed for 2 minutes, until light and fluffy.
- Add the eggs and vanilla and mix again until well combined. Scrape down the sides of the bowl if necessary.
- Turn the mixer on low speed and carefully add the flour and salt. Mix until well combined on low speed.
- Turn the dough onto a piece of plastic wrap and wrap the dough. Place it in the refrigerator for at least 30 minutes.
- When ready to bake, preheat the oven to 350 degrees.
- Take the dough out of the refrigerator and pinch of a 1 inch piece of dough. Roll the dough into a ball and place it on a baking sheet. Press your thumb into the center of the cookie to make a well. Repeat this process for the rest of the dough.
- Bake for 12 minutes or until the cookies are just slightly golden brown.
- Remove the cookies from the baking sheet and place them on a wire rack to cool.
- While the cookies cool, microwave the Nutella in a microwave safe bowl for 15 seconds and then pour it into a gallon Ziploc bag. Cut off the end of the Ziploc bag and pipe the Nutella into the center of the cookie.
Notes
- Start with ½ cup of Nutella, but if you need more feel free to add more as needed.
- Refrigerating the dough will prevent it from spreading too much when you bake it.
- The Nutella will stay a little wet in the center of the cookies. Try not to stack them, as they will make a mess. These cookies are perfect to be laid out on a cookie tray.


David says
These were so stinking good!
Maureen Conmy says
Love your website. You have so many wonderful recipes and they all look so good. A lot of healthy good food! Thanks for sharing.